How to build a basic todo app with Vanilla JavaScript
Todo app tutorial for beginners using HTML, CSS and JavaScript
I try my best to teach technical web development concepts in an easier and more fun way.
It is often said that one of the ways to really get better at programming is by building projects. And CRUD (Create, Read, Update, and Delete) apps are one way to improve your coding skills as a developer. In this article, we are going to build a straightforward Todo List app. This article is geared toward beginners and we will focus more on the JavaScript aspect. Let’s dive right into it 😉.
🚦PREREQUISITE
Basic knowledge of HTML and CSS.
Basic knowledge of JavaScript (I'd still explain everything)
🏚️HTML MARKUP
The HTML markup is quite simple because we will be generating most of the HTML code dynamically from JavaScript. Here is the code 👇🏽
<!DOCTYPE html>
<html lang="en">
  <head>
    <meta charset="UTF-8" />
    <meta http-equiv="X-UA-Compatible" content="IE=edge" />
    <meta name="viewport" content="width=device-width, initial-scale=1.0" />
    <link rel="stylesheet" href="style.css" />
    <script
      src="https://kit.fontawesome.com/9acea6f878.js"
      crossorigin="anonymous"
    ></script>
    <title>Todo list app</title>
  </head>
  <body>
    <div class="container">
      <div class="content">
        <h1>todo list</h1>
        <form id="form">
          <input type="text" id="item" placeholder="Enter todo" />
          <input type="submit" value="Add" class="btn" />
        </form>

        <ul class="todos"></ul>
      </div>
    </div>

    <script src="./app.js"></script>
  </body>
</html>
Basically, we created a parent div with a class of container and inside it, we also created another div with a class of content which has three children which are h1 , form and ul . The h1 is the title, The form has two inputs. The first input is the text where a user can enter a todo and the second input is the submit and it also has a value that we set as Add where a user can add the todo that has been entered. The last one is the ul which has a class of todos . But there are no elements (todo) inside it yet because we are going to be generating it from JavaScript based on what the user enters.
🏡 CSS MARKUP
For the CSS part, we are just making the HTML markup look good by adding some styles to it. Here is the code.
@import url('https://fonts.googleapis.com/css2?family=Poppins:wght@400;500;600&display=swap');

* {
  margin: 0;
  padding: 0;
  box-sizing: border-box;
}

html,
body {
  height: 100%;
}

body {
  font-family: 'Poppins', sans-serif;
  background-color: #e6e6e6;
}

.container {
  display: flex;
  flex-direction: column;
  justify-content: center;
  align-items: center;
  height: 100%;
  text-align: center;
}

ul {
  list-style: none;
}

h1 {
  text-transform: capitalize;
  margin-bottom: 1rem;
}

.content {
  border-radius: 1rem;
  background-color: white;
  width: 450px;
  padding: 3rem;
}

input[type='text'] {
  height: 44px;
  outline: none;
  font-family: inherit;
  width: 82%;
  border: 1.5px solid black;
  padding-left: 0.5rem;
  margin-bottom: 1rem;
}

.btn {
  cursor: pointer;
  padding: 0.8rem 1rem;
  border-radius: 0.3rem;
  background-color: black;
  border: none;
  color: white;
  font-family: inherit;
}

.todo {
  display: flex;
  align-items: center;
  justify-content: space-between;
  background-color: black;
  color: white;
  padding: 1rem;
  border-radius: 0.3rem;
  margin-bottom: 0.3rem;
}

.delete {
  font-size: 1.3rem;
  cursor: pointer;
}

.alert {
  padding: 0.625rem 1.25rem;
  margin-bottom: 0.188rem;
  border-radius: 0.3rem;
  color: white;
}

.alert-danger {
  background-color: red;
}

.alert-success {
  background-color: green;
}
From the code above, we are just styling the elements that we created in our HTML file. The only thing that is different is the delete and alert class. If you notice, these two classes are not in our HTML file but we are going to be generating them from JavaScript which is why they are just styled down.
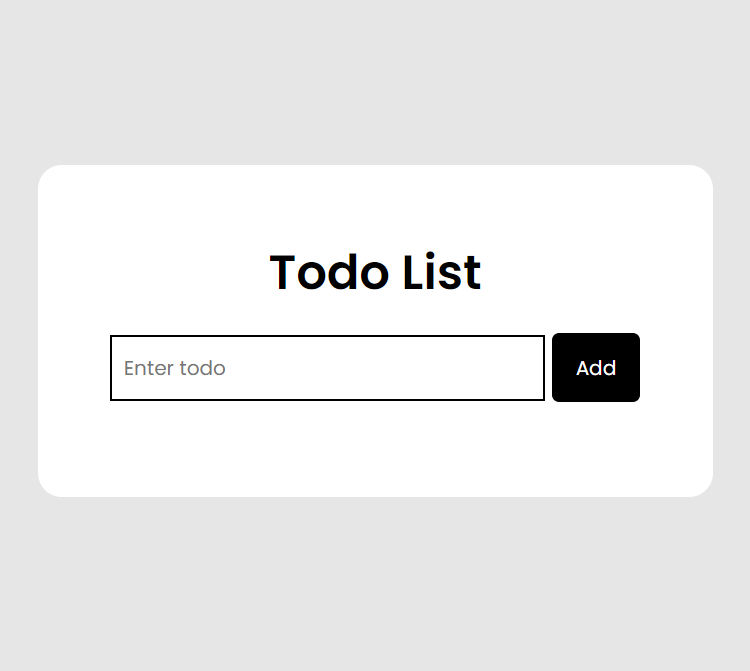
Here is the output of the HTML and CSS code 👇🏽
🏗️ JavaScript Code
This is the most interesting part of the project, and we’ll be dividing it into different segments so that we will not be overwhelmed;
First Segment
In this segment, we are going to be grabbing some of the elements we need from the DOM (Document Object Model). Here they are 👇🏽
const form = document.querySelector('#form');
const input = document.querySelector('#item');
const todoList = document.querySelector('.todos');
As you can see above, we are just grabbing three elements that are in the HTML file and also giving them different variables as well.
Second Segment
In this segment, we’ll be doing two things;
First, we are going to add an event listener to the form variable we created.
An event listener is basically a procedure in JavaScript that waits for an event to occur. In this case, we will be waiting for the submit event to occur and as soon as it occurs, we are going to run a function with the name of addTodo (which is the second thing we are going to talk about in a minute). Here is the code for more clarity 👇🏽
form.addEventListener('submit', addTodo);
Secondly, we are going to create the addTodo function that is going to run whenever we submit/add a todo.
And there are a couple of things that we will be doing inside the addTodo function, but we are going to take them one at a time.
Step 1
In this first step, we are going to be creating the addTodo arrow function with todo as the parameter. The todo can be anything since it is a parameter. But we are just using it as the event from the form . And inside the addTodo function, we are going to prevent the form from submitting by default. Because forms in JavaScript always submit by default. And we going to prevent it by using the event (which we named as the todo ). Here is the code 👇🏽
const addTodo = (todo) => {
// prevent the form from being submitted
    todo.preventDefault();
};
PS: You can also use normal function if you want to.
Step 2
In this step, we are going to get the input value that a user will enter and we also going to store the input value in a variable called inputValue.
const addTodo = (todo) => {

// get the user value from the input field
const inputValue = input.value;

};
Step 3
Next, we are going to create some elements dynamically as I said in the beginning, and will also append the elements to the todoList variable. I will still explain more but here is the code for more clarity 👇🏽
const addTodo = (todo) => {

// create new todo list
const newTodo = document.createElement('div');
    newTodo.className = 'todo';
    newTodo.innerHTML = `
      <li>${inputValue}</li>
      <i class="fa-solid fa-xmark delete"></i>
  `;

    // append new Todo the todo List
    todoList.appendChild(newTodo);

};
From the code above, we created a div element and stored it in a variable called newTodo . We then gave it a className of todo so that we can style it in our CSS file. After that, we then created two HTML elements inside the newTodo and we created it using the innerHTML property.
The first HTML element we created is the li which holds the value that a user will enter and since we are adding the value dynamically, we used template literal, and template literal provides an easy way to interpolate variables and expressions into strings. so we interpolated the inputValue into string.
The second HTML element we created is the delete button and we used the font awesome delete icon and gave it a class of delete because we are going to use it to access the icon.
Lastly, We will append the newTodo to the todoList since the newTodo is a child of the parent container which is the todoList (The ul with a class of todo that we created in our HTML file).
Before we move on to the next step, here is all the code we’ve written so far with the output as well 👇🏽
// SELECTORS
const form = document.querySelector('#form');
const input = document.querySelector('#item');
const todoList = document.querySelector('.todos');

// FUNCTIONS
// 1. Add todo to the todo list
const addTodo = (todo) => {
  // prevent the form from being submitted
  todo.preventDefault();

  // get the user value from the input field
  const inputValue = input.value;


    // create new todo list
    const newTodo = document.createElement('div');
    newTodo.className = 'todo';
    newTodo.innerHTML = `
      <li>${inputValue}</li>
      <i class="fa-solid fa-xmark delete"></i>
  `;

    // append new Todo the todo List
    todoList.appendChild(newTodo);


};

form.addEventListener('submit', addTodo);
Here is the output 👇🏽
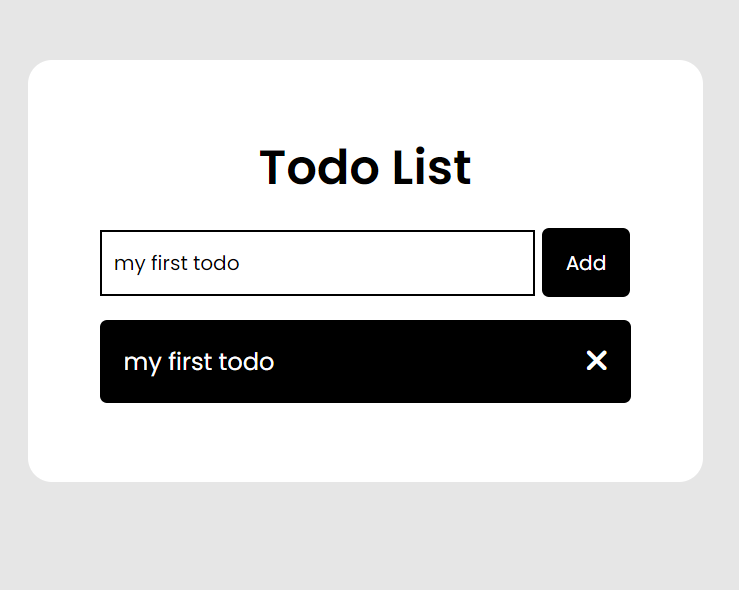
From the output above, you will notice that when we add a todo, the input field still shows the todo we entered which does not make any sense. So will have to clear the input field anytime a todo is added. And this will lead us to the next step;
Step 4
This step is actually the easiest step in this tutorial, and what we are going to do is just set the input value to an empty string. Here is the code for more clarity 👇🏽
const addTodo = (todo) => {

 // clear the input field after adding a new todo
  input.value = '';

};
Here is how the output will look like after adding the code we just wrote 👇🏽
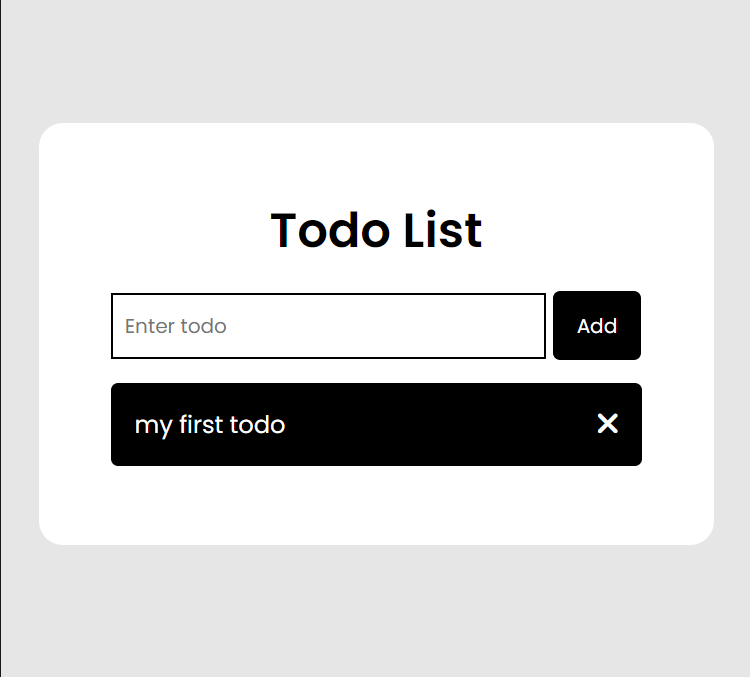
This is all we need so far inside the addTodo function.
We’ve only been adding todo. So let’s start deleting todo which leads us to the next segment.
Third Segment
In this segment, we are going to create a deleteTodo function so that we can delete the todo. And we are going to use something called eventPropagation to do it. The reason is that if we have multiple todo , we can’t just target the delete button directly because it is only going to delete the only first todo . So, we are using the eventPropagation to basically to select the todoList which above the delete button so that we can target whatever we click inside of it which is going to be the delete button.
I know this might sound confusing at first but let’s see the code to get a better understanding of what is going on 👇🏽
// Remove todo from the todo list
const deleteTodo = (e) => {
  const todo = e.target;

  if (todo.classList.contains('delete')) {
    todo.parentElement.remove();
  }
};

todoList.addEventListener('click', deleteTodo);
From the code above, we added the deleteTodo function that is going to run whenever we click on the todoList . But we do not want to click on the todoList (which is the ul ). We only want to target the delete button whenever we click the todoList .
Moving on, we then stored the e.target inside the todo variable. After that, we also wrote an if statement to simply target the classList that contains the class called delete and then remove the parentElement which is the newTodo.
In a nutshell, what the code is doing is that whenever we click on the delete button, the parentElement which is the newTodo should be removed.
Fourth Segment
So far we have been able to add and delete todo but we are not getting a message that tells us if we have added or deleted a todo. That is what we are going to be doing in this segment.
We are going to create a function called showAlert that we are going to use inside the addTodo and deleteTodo function.
The showAlert function is going to have two parameters which are message and classname. Inside the showAlert function, we going to create a div element and store it inside a variable called div . we are also going to give it a className and that classname will be based on what we set it to in the addTodo or deleteTodo function. After that, we are also going to create a text node using the createTextNode method and that text will be the message that is going to be passed in based on what we set it to in the addTodo or deleteTodo function and we will also append it to the div element. After that, we will have to insert it in the DOM so we will need to grab the container from the HTML document which is the parentElement because we want to insert the div element before the form . Since we’ve already grabbed the form we are just going to take the container variable and add we going to use a method called insertBefore which takes two parameters and those two parameters will be the div element and the form.
So we basically saying that the div element should come before the form.
Here is the code for more clarity 👇🏽
// Show alert
const showAlert = (message, classname) => {
  const div = document.createElement('div');
  div.className = `alert alert-${classname}`;
  div.appendChild(document.createTextNode(message));
  const container = document.querySelector('.content');
  container.insertBefore(div, form);
};
We also need to set a specific time that the showAlert show run and we can do that using the setTimeout method. Here is the code 👇🏽
setTimeout(() => document.querySelector('.alert').remove(), 2000);
From the code above, we are basically getting the alert class and removing it after 2 seconds.
Here is the code in full 👇🏽
// Show alert
const showAlert = (message, classname) => {
  const div = document.createElement('div');
  div.className = `alert alert-${classname}`;
  div.appendChild(document.createTextNode(message));
  const container = document.querySelector('.content');
  container.insertBefore(div, form);

  setTimeout(() => document.querySelector('.alert').remove(), 2000);
};
Before we are going to add the showAlert function to the addTodo or deleteTodo function, let’s do some form validation which then leads us to the last segment in this article.
Fifth Segment
In this segment, we are basically going to show an error message using the showAlert function if a user is trying to add/submit an empty field and vice versa. Here is the code 👇🏽
if (!inputValue) {
    showAlert('Please fill in the field', 'danger');
  } else {
    // create new todo list
    const newTodo = document.createElement('div');
    newTodo.className = 'todo';
    newTodo.innerHTML = `
      <li>${inputValue}</li>
      <i class="fa-solid fa-xmark delete"></i>
  `;
    todoList.appendChild(newTodo);

    showAlert('Todo added', 'success');
  }
From the code above, we wrote an if statement to check if the input field has any value and if it does not have then we are going to run showAlert function (as seen above) and if the input field is not empty we are also going to run the showAlert function again with different arguments.
Here is the code inside the addTodo function 👇🏽
const addTodo = (todo) => {
  // prevent the form from being submitted
  todo.preventDefault();

  // get the user value from the input field
  const inputValue = input.value;

  if (!inputValue) {
    showAlert('Please fill in the field', 'danger');
  } else {
    // create new todo list
    const newTodo = document.createElement('div');
    newTodo.className = 'todo';
    newTodo.innerHTML = `
      <li>${inputValue}</li>
      <i class="fa-solid fa-xmark delete"></i>
  `;

    // append new Todo the todo List
    todoList.appendChild(newTodo);

    showAlert('Todo added', 'success');
  }

  // clear the input field after adding a new todo
  input.value = '';
};
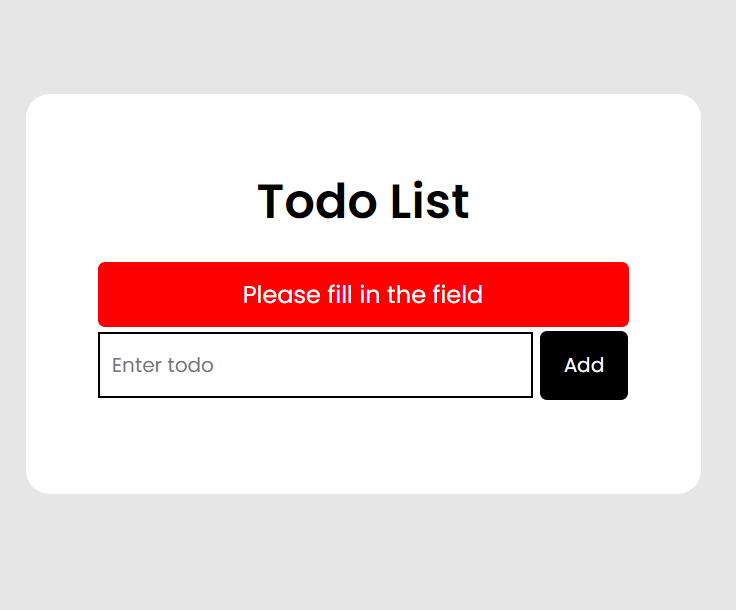
Here is the output for the error message if the field is empty 👇🏽
Here is the output for the success message if the field is not empty 👇🏽

Here is the code inside the deleteTodo function. 👇🏽
// Remove todo from the todo list
const deleteTodo = (e) => {
  const todo = e.target;

  if (todo.classList.contains('delete')) {
    todo.parentElement.remove();
    showAlert('Todo removed', 'success');
  }
};
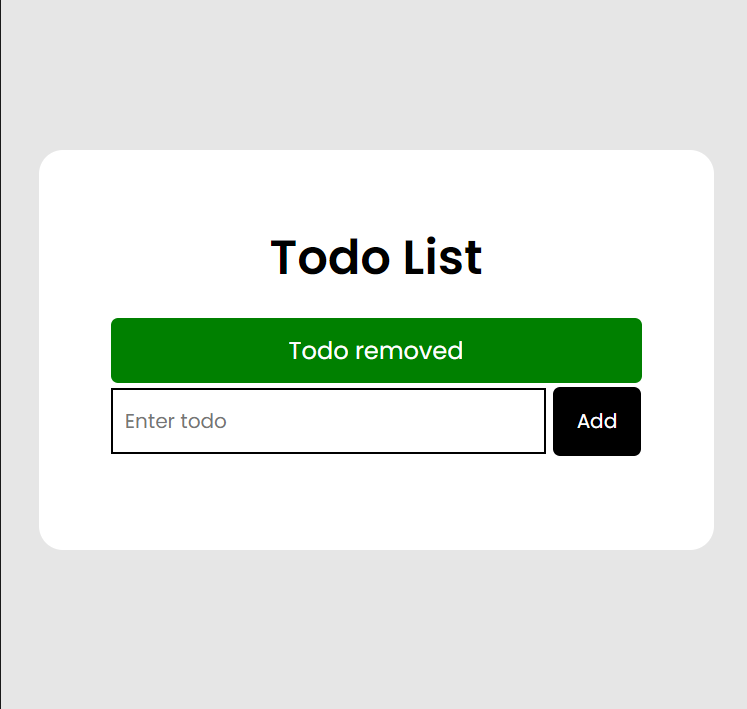
Here is the output 👇🏽
💡 If you are wondering where the danger and success class is coming from? Remember earlier in this article I said they were already styled down in our CSS file.
Here is the entire JavaScript code 👇🏽
// SELECTORS
const form = document.querySelector('#form');
const input = document.querySelector('#item');
const todoList = document.querySelector('.todos');

// FUNCTIONS
// 1. Add todo to the todo list
const addTodo = (todo) => {
  // prevent the form from being submitted
  todo.preventDefault();

  // get the user value from the input field
  const inputValue = input.value;

  if (!inputValue) {
    showAlert('Please fill in the field', 'danger');
  } else {
    // create new todo list
    const newTodo = document.createElement('div');
    newTodo.className = 'todo';
    newTodo.innerHTML = `
      <li>${inputValue}</li>
      <i class="fa-solid fa-xmark delete"></i>
  `;

    // append new Todo the todo List
    todoList.appendChild(newTodo);

    showAlert('Todo added', 'success');
  }

  // clear the input field after adding a new todo
  input.value = '';
};

// Remove todo from the todo list
const deleteTodo = (e) => {
  const todo = e.target;

  if (todo.classList.contains('delete')) {
    todo.parentElement.remove();
    showAlert('Todo removed', 'success');
  }
};

// Show alert
const showAlert = (message, classname) => {
  const div = document.createElement('div');
  div.className = `alert alert-${classname}`;
  div.appendChild(document.createTextNode(message));
  const container = document.querySelector('.content');
  container.insertBefore(div, form);

  setTimeout(() => document.querySelector('.alert').remove(), 1000);
};

// EVENT LISTENERS
form.addEventListener('submit', addTodo);
todoList.addEventListener('click', deleteTodo);
Here is the live link to the Todo app as well as the GitHub link 👇🏽
CONCLUSION
Congratulations on getting to the end of the article 🎉 😀. I really hope you understand how to build a basic CRUD app. And one thing to note about building stuff like this is to break them into parts or components. You can also push yourself by adding more functionalities to it too.
Alright, guys till next week. Have an amazing weekend 😉


